Configuring and deploying Splunk Data Management Pipeline Builders
Splunk Data Management Pipeline Builders are data processing solutions to help optimize costs around data access, storage and transfer. They also significantly improve your time to value given that you are working with smaller, enriched and more contextual data sets at search time.
Edge Processor is customer-hosted and works at the edge of your network, while Ingest Processor is Splunk-hosted and offers processing on ingest. You can use either pipeline builder to filter, mask, and transform your data before routing the processed data to supported destinations. Learn more about how Edge Processor and Ingest Processor work.
This article will walk you through how to configure and deploy an Edge Processor or Ingest Processor so you can create a pipeline to transform and manage data. It will also introduce some of the core features of these powerful tools and how they can help you manage your data more efficiently.
You are currently at Phase 2 in the Data Management Pipeline Builders getting started guide. Navigate to Phase 1 for an overview of getting started with pipeline builders.
Prerequisites
- Verify that you have access to Splunk Data Management (learn more).
- Connect your tenant to a Splunk Cloud Platform deployment. If you are the first user on your tenant, you need to complete the first-time setup instructions to connect your tenant. This connection will provide indexes for storing the logs and metrics passing through the processors.
- First-time setup instructions for Edge Processor for Splunk Cloud Platform.
- First-time setup instructions for Edge Processor for Splunk Enterprise.
- First-time setup instructions for Ingest Processor.
Edge Processor is included with your Splunk Cloud Platform or Splunk Enterprise subscription at no additional cost. The Ingest Processor “Essentials” tier is also included with Splunk Cloud Platform subscriptions. Learn more about the requirements to use Edge Processor or Ingest Processor and how to request access if needed.
Access Splunk Data Management
For Splunk Cloud Platform customers, you can access Data Management in the following ways:
- Login to Splunk Cloud Platform. From the Splunk Web UI homepage, click Settings > Add data > Data Management Experience.
- Directly navigate to Data Management using the following link: https://px.scs.splunk.com/<your Splunk cloud tenant name>
For Splunk Enterprise customers, you can set up a dedicated machine or leverage an existing one in your management tier that can accommodate additional workloads. If you are a Splunk administrator, then after installing (or upgrading to) Splunk Enterprise 10.0, you’ll see “Data Management” in the apps list after you log in.
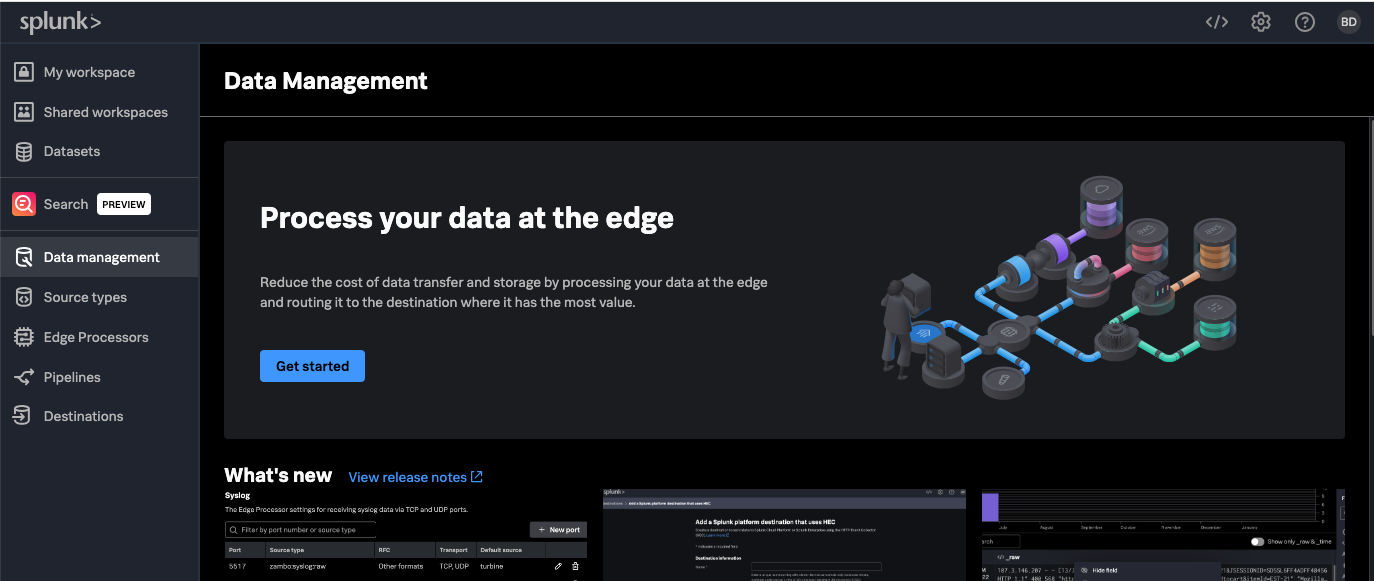
The Splunk Data Management homepage tabs include:
- Data management. Get started and stay up-to-date on what’s new, view release notes, monitor your system logs, get documentation and provide your feedback.
- Source types. Provides custom configuration of event breaking for inbound data.
- Edge Processors. Add new Edge Processor nodes and view currently deployed nodes.
- Ingest Processor. Add new Ingest Processors and view currently deployed ones.
- Pipelines. Use SPL2 to construct filtering, masking, and routing logic for your inbound data.
- Destinations. The current routing destinations that are available. You should see the Splunk Cloud Platform account that you specified. You can configure additional Splunk or Amazon S3 destinations from here.
Configure and deploy Splunk Edge Processor for Splunk Cloud Platform
Login to Splunk Cloud Platform and navigate to the Splunk Data Management console to start using Edge Processor. After you access Edge Processor, you only need to copy and paste a command line into your Linux machine to install your first Edge Processor node.
Watch the video or follow the steps below to create a basic Edge Processor and pipeline setup that receives data from a forwarder, processes the data as needed, and then sends the processed data to an index or an Amazon S3 bucket for low-cost storage. For more information, refer to the full documentation.
- Access Splunk Edge Processor using the following link: https://px.scs.splunk.com/<your Splunk cloud tenant name>
- Use the same username and password as you would when logging in to your Splunk Cloud Platform deployment.
- From the Splunk Edge Processor landing page, click the Edge Processor tab on the left.
- You can deploy Edge Processors on the infrastructure of your choice, including an Amazon EC2 instance, or a virtual or physical server in your data center.
- Create a new Edge Processor cluster.
- Give it a name and description.
- Optional steps:
- Customize the default destination for storing unprocessed data, such as Amazon S3 (see Add or manage destinations for more information).
- Configure settings relating to the transport protocol such as S2S or HEC, and enable TLS encryption for additional security.
- Copy and paste the output script on a machine in your network (e.g. Linux server) to install the Edge Processor. After the instance is registered, you can monitor its status from the data management console.
Configure and deploy Splunk Edge Processor for Splunk Enterprise
Set up a dedicated machine or leverage an existing one in your management tier that can accommodate additional workloads. If you are a Splunk administrator, then after installing (or upgrading to) Splunk Enterprise 10.0, you’ll see “Data Management” in the apps list after you log in. When you open it the first time, the application presents you with requisite one-time configuration options and pointers to where you can find those options in configuration (conf) files. Set those configurations, restart Splunk Enterprise, log back in, and return to the Data Management app to begin optimizing your data.
Configure and deploy Splunk Ingest Processor
Login to Splunk Cloud Platform and navigate to the Splunk Data Management console to start using Ingest Processor.
Follow the steps below to create a basic Ingest Processor and pipeline setup that receives data from a forwarder, processes the data as needed, and then sends the processed data to an index or an Amazon S3 bucket for low-cost storage. For more information, refer to the full documentation.
- Access Ingest Processor https://px.scs.splunk.com/<your Splunk cloud tenant name>
- Use the same username and password as you would when logging in to your Splunk Cloud Platform deployment.
- Optional step: Customize the default destination for storing unprocessed data - Splunk Cloud Platform, Splunk Observability Cloud, or Amazon S3 (see Add or manage destinations for more information).
Create a pipeline to process data
Pipelines are SPL2 statements that specify what data to process, how to process it, and to which destination the processed data should be sent. It is how you dictate your desired filtering, masking, and routing logic. Pipelines allow you to optimize data storage and transfer costs while also getting a more contextual dataset for search. Create a new pipeline to specify how you want to process and route your data using SPL2 (see pipeline syntax and SPL2 search manual for more information).
For more detailed information, please refer to the full documentation to create a pipeline for Edge Processor or Ingest Processor.
- Click the Pipelines tab on the left and select New pipeline.
- Select the type of pipeline you would like to create: Edge Processor pipeline or Ingest Processor pipeline.

- You have two options to build your pipeline:
- Use a pre-built template to easily create a new pipeline for Linux, Syslog, and Windows data. Templates are Splunk-built SPL2 for preprocessing and are customizable. New templates will be added over time.

- Write your own SPL2 scripts by clicking New pipeline.
- Use a pre-built template to easily create a new pipeline for Linux, Syslog, and Windows data. Templates are Splunk-built SPL2 for preprocessing and are customizable. New templates will be added over time.
- After you've built your pipeline, you can use the preview feature to test it and see the data before and after your logic is applied.
- Once the pipeline is applied, you can monitor the volume of data coming in and out via the detailed cluster view (see below).
Example: Create a pipeline to transform and manage data
This video walks you through how to create a pipeline to filter, enrich, and route data. In this demo, a pipeline is created to only retain events where the event code matches a certain value, and enrich those events with additional fields. You can then route the data to a Splunk index or an Amazon S3 bucket. See Implementing use cases with Data Management Pipeline Builders for more use case ideas.
Detailed cluster view
The detailed cluster gives you a panoramic view of everything the Edge Processor or Ingest Processor cluster is servicing, including:
- Information relating to incoming sources and pipelines applied
- The volume of incoming and outgoing data
- Metrics around the performance of your edge processor instances to help you make decisions on scaling up or scaling down (applicable to Edge Processor only)
- Visual graphs to help you understand the data that is being processed and sent downstream
Next steps
Review the resources below, then click the Next step button below to start implementing use cases with Data Management Pipeline Builders.
- Join the #edge-processor on the Splunk Community Slack for direct support (sign in with SSO here: http://splk.it/slack)
- Splunk Resource: Data Management resource hub
- Splunk Blog: Introducing Edge Processor: Next gen data transformation
- Splunk Tech Talk: Introducing Edge Processor
- Splunk .Conf Talk: Getting data in more efficiently Using the Splunk Edge Processor (session slides)
- Splunk Blog: Data preparation made easy: SPL2 for Edge Processor
- Splunk Blog: Addition of Syslog in Splunk Edge Processor supercharges security operations with Palo Alto Firewall log reduction
- Stay up-to-date with release notes for Edge Processor and Ingest Processor