Getting started with the Microsoft Teams Add-on for Splunk
This article walks you through setting up the Microsoft Teams Add-on for Splunk to retrieve call record data. For more information about Microsoft Teams call record data, how the data is made available, and how to utilize the data, refer to Getting started with Microsoft Teams call record data.
How to use Splunk software for this use case
The instructions you'll need to follow will vary depending on the version you're using of the Microsoft Teams Add-on for Splunk. Microsoft has introduced a new REST API to retrieve Teams Call Record data which eliminates the need for a Teams subscription and Teams webhook. Version 2.x of the Microsoft Teams Add-on for Splunk includes a new input which utilizes this API and simplifies the setup process. Click to jump to the instructions for the version that applies to you:
Versions 2.x
Set up a Teams global account
- Create an Entra ID app registration in the Azure portal.
- Assign the CallRecords.Read.All (Application) permission to the Azure AD app registration.
- Launch the Microsoft Teams Add-on for Splunk.
- Select Configuration > Add.

- Enter the following details:
- Account name
- Client ID (application ID) from your Entra ID app registration
- Client Secret from your Entra ID app registration
- Click Add.

Set up a Teams call record input
- Launch the Microsoft Teams Add-on for Splunk.
- Select Inputs > Create New Input > Teams Call Record (New).

- Enter the following details:
- Enter a Name.
- Enter an Interval. This input should run frequently to check for received call record headers.
- Select an Index.
- Select a Global Account.
- Enter the Tenant ID, otherwise known as a Directory ID. You can get this from the Azure portal.
- Select the Environment.
- Choose to include or exclude null values.
- Select a Start Date.
- Select an Endpoint.
- Click Add.

Verify call record data
Run the following search:
sourcetype="m365:teams:callrecord" earliest=0
Results will only appear after a Teams call has ended. It takes a few minutes for Microsoft Teams to push the call record header to the Splunk platform after a call ends.
Versions 1.x
Set up a Teams webhook in the Splunk platform
The first thing you need to do is set up a webhook to receive the call record header data. The Spunk Add-on for Microsoft Teams includes a Microsoft Teams-specific webhook that will respond in the way Microsoft wants. Here's how to set it up:
- Launch the Microsoft Teams Add-on for Splunk.
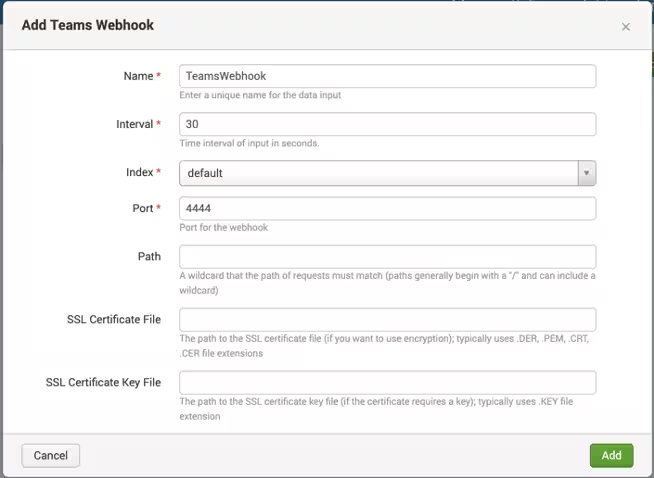
- Select Inputs > Create New Input > Teams Webhook.
.png?revision=1)
- Enter the following details:
- Enter a Name.
- Enter an Interval.
- Select an Index.
- Enter a Port. This is the port the webhook will use for receiving data.
- Leave the Path blank. This might be used in the future, but Teams currently does not use a path.
- (Optional) Enter the full path to an SSL Certificate File. This is only necessary if you will expose your Splunk instance to the internet.
- (Optional) Enter the full path to an SSL Certificate Key File. This is only necessary if you will expose your Splunk instance to the internet.
- Click Add.
.png?revision=1)
The webhook must be a publicly accessible, HTTPS-secured endpoint that is addressable via a URL. You have two options to set up the Splunk instance running the Teams add-on. You can make it publicly accessible via HTTPS. Or you can use a load balancer, reverse proxy, tunnel, etc. in front of your Splunk instance running the add-on. The second option here can be preferable if you don't want to expose the Splunk heavy forwarder to the internet, as the public traffic terminates at that demarcation and then continues on internally to the Splunk heavy forwarder.
Test your webhook
Use one of these two options to test your webhook:
- Use the following command line test and look for a response of
{"success": true}:curl WEBHOOK_ADDRESS -d '{"value": "test"}' - Run the following search in the Splunk platform and look for an event that looks like the screenshot below.
sourcetype="m365:webhook"
.png?revision=3)
Set up a Teams call record subscription
A change notification subscription defines which webhook Microsoft should deliver call record headers to after a call has ended. The Microsoft Teams Add-on for Splunk includes an input to set up a change notification subscription.
- Create an Azure AD app registration in the Azure portal
- Assign the following permissions to the Azure AD app registration:
- CallRecords.Read.All (Application)
- Subscriptions.Read.All (Delegated)
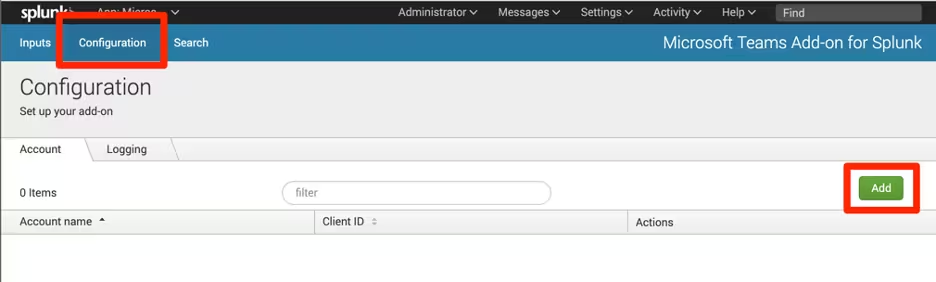
- Launch the Microsoft Teams Add-on for Splunk.
- Select Configuration > Add.
.png?revision=1)
- Enter the following details:
- Account name
- Client ID (application ID) from your Azure AD app registration
- Client Secret from your Azure AD app registration
.png?revision=1)
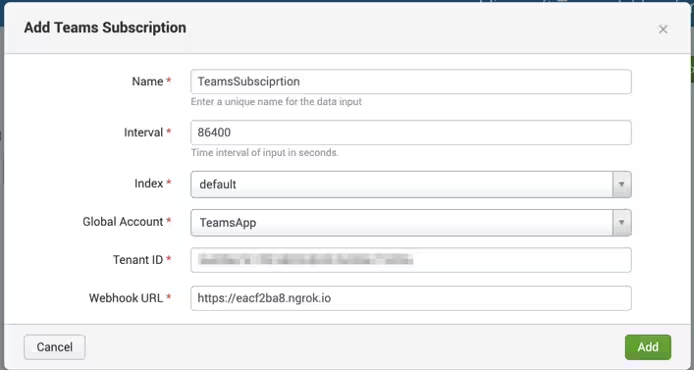
- Click Inputs > Create New Input > Teams Subscription.
.png?revision=1)
- Enter the following details:
- Enter an Interval. This specifies how often to update the subscription. If a subscription is not updated, it will expire. Setting this value to 86400 (24 hours) is sufficient.
- Select an Index.
- Select an Account.
- Enter the Tenant ID, otherwise known as a Directory ID. You can get this from the Azure portal.
- Enter the Webhook URL.
.png?revision=1)
Verify subscription data
Run the following search:
sourcetype="m365:subscription" earliest=0
The response you're looking for should look like this:
{
   @odata.context: https://graph.microsoft.com/beta/$metadata#subscriptions/$entity
   applicationId: 838ce3f0-3331-495b-aacf-b49ceb733483
   changeType: created,updated
   clientState: null
   creatorId: cb82d991-860f-438b-8a53-af4c22c4c99f
   encryptionCertificate: null
   encryptionCertificateId: null
   expirationDateTime: 2023-11-01T04:46:01Z
   id: 6fe8db86-fe3a-4a31-a345-36c65b55f9cb
   includeProperties: null
   includeResourceData: null
   latestSupportedTlsVersion: null
   lifecycleNotificationUrl: null
   notificationUrl: https://your_webhook_url
   resource: /communications/callRecords
}
Set up a Teams call record input
The Teams call record input in the add-on implements a REST client to retrieve the full Microsoft Teams call record data based on the header received from the webhook.
- Launch the Microsoft Teams Add-on for Splunk.
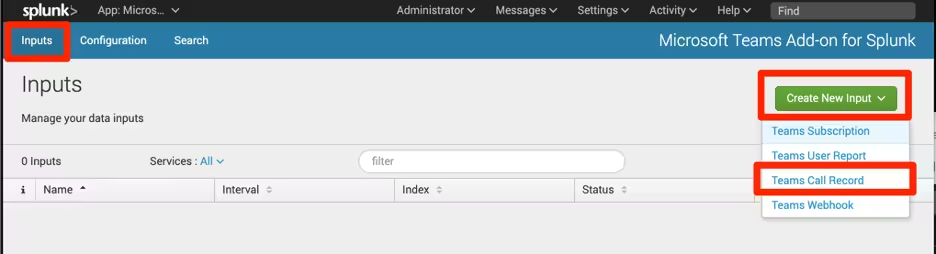
- Select Inputs > Create New Input > Teams Call Record.
.png?revision=1)
- Enter the following details:
- Enter a Name.
- Enter an Interval. This input should run frequently to check for received call record headers.
- Select an Index.
- Select a Global Account.
- Enter the Tenant ID, otherwise known as a Directory ID. You can get this from the Azure portal.
Verify subscription data
Run the following search:
sourcetype="m365:teams:callrecord" earliest=0
Results will only appear after a Teams call has ended. It takes a few minutes for Microsoft Teams to push the call record header to Splunk after a call ends.
Next steps
After call record data is ingested, the Microsoft 365 App for Splunk has several out-of-the-box dashboards to visualize common use case scenarios. Refer to Getting started with Microsoft Teams call record data for more details.
In addition, these resources might help you understand and implement this guidance: