Installing and configuring Splunk Stream
Splunk Stream is a great way to monitor network traffic from a host or via a network TAP or SPAN port. The software acts as a network traffic sniffer. The most common way to implement Stream is to install it on the host that's generating the traffic you want to capture, frequently a Windows Domain Controller serving DHCP and DNS server roles.
The next most common model is to install Stream on a SPAN port or a network TAP, allowing you to have an out-of-band Stream host monitoring the network. The Splunk configuration for that setup is identical. The only difference is you need your network team to assist.
Stream indexes and source types
Create an index to store the DNS data that Stream will produce. While Stream has the ability to dissect many different network protocols, this article focuses on DNS. By default, when Stream generates an event for a DNS session, it has a source type of stream:dns. When creating indexes for Stream to store data, we recommended following Lantern's naming convention guidance.
Install the Stream App
To get started with Stream, first review the installation package overview page to determine which apps need to be installed on which components. The on-premise and cloud deployment architectures guide you through various different installation options depending on your environment. Ensure you install Splunk App for Stream on an instance that allows configuring of Stream on forwarders.
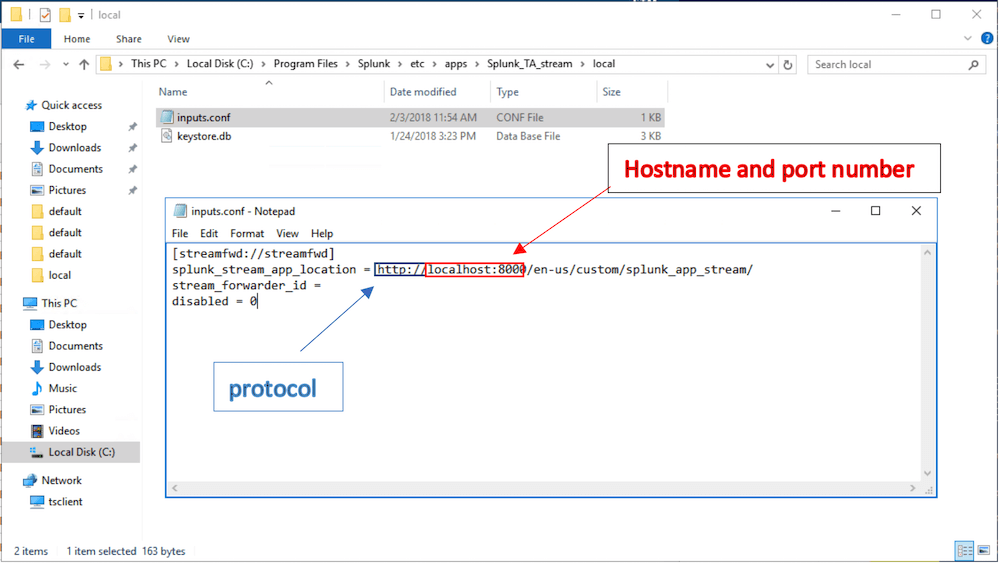
Ensure you have installed and configured the Stream add-on on forwarders to monitor the appropriate network interface. When configuring a Stream forwarder, the location of the Splunk Stream management server is stored in inputs.conf.
You'll need the Splunk_TA_stream app for a forwarder configuration. The custom inputs.conf that resides in that app should point to your remote Stream server, as below. Be sure to modify the protocol if you're utilizing SSL/TLS on your Stream server.
[streamfwd://streamfwd]
splunk_stream_app_location = http://remote_stream_server:8000/en-us/custom/splunk_app_stream/
stream_forwarder_id =
disabled = 0
After the Splunk App for Stream is installed, open the Splunk Stream app from the main menu. Accept the defaults and click Let's Get Started.
You might want to check that the forwarder(s) is communicating with the search head that is running the Stream app. You can check in the Stream app under Admin Dashboards > Stream Forwarder Status to view which forwarders are communicating with the Stream app.
Now you're ready to configure Stream to monitor the relevant network interface on your Windows server, and forward the resulting DNS metadata to your Splunk indexers.
Configure a new DNS stream
Implementation
- Within the Splunk Stream app, select Configuration > Configure Streams.

- The Configure Streams dashboard displays the default settings for protocol information to be collected. You might want to disable the defaults, then select the protocol and details to create your new stream. You can select all of the available protocols and disable them all at once, by clicking the checkbox next to Name on the title bar.
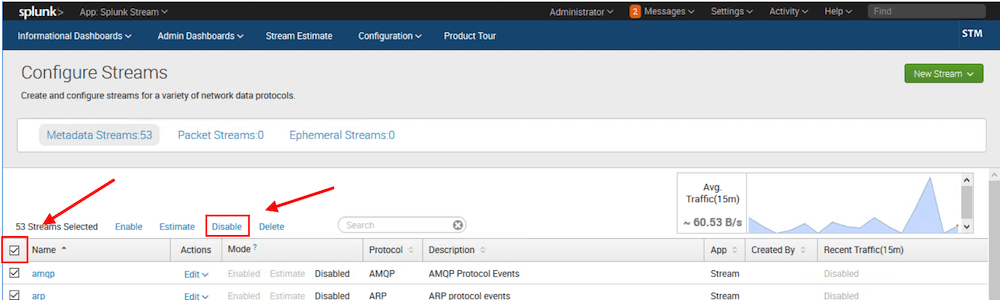
- After selecting all of the protocols, click the Disable option.
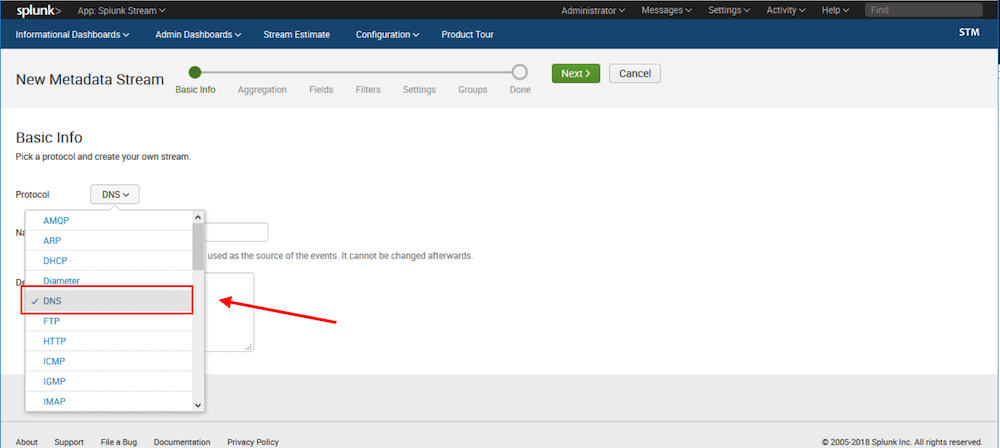
- Create a new stream for collecting the DNS details that you'd like to capture. Start by clicking the New Stream button, then Metadata Stream.

- This takes you into a workflow that allows you to configure the stream. Select DNS as the protocol in the Basic Info step of the workflow.
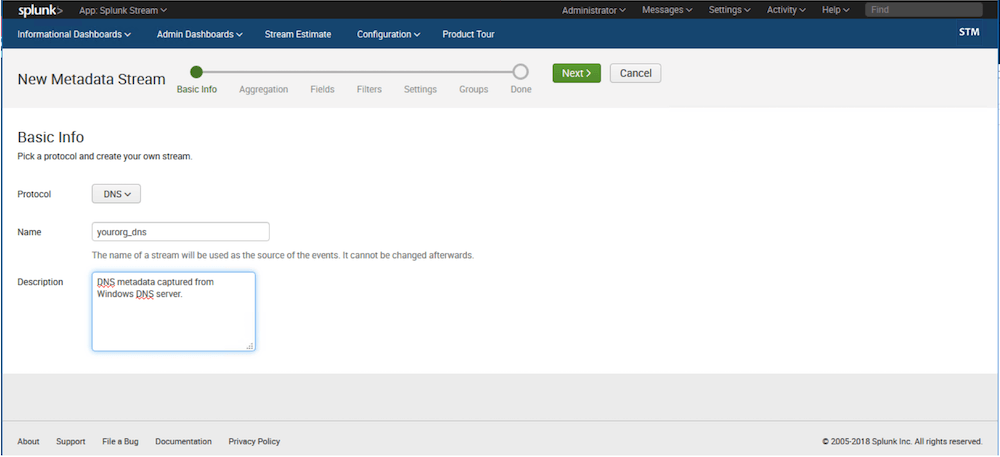
- Give the stream a name and description with some context to help you to identify the data, then click Next.
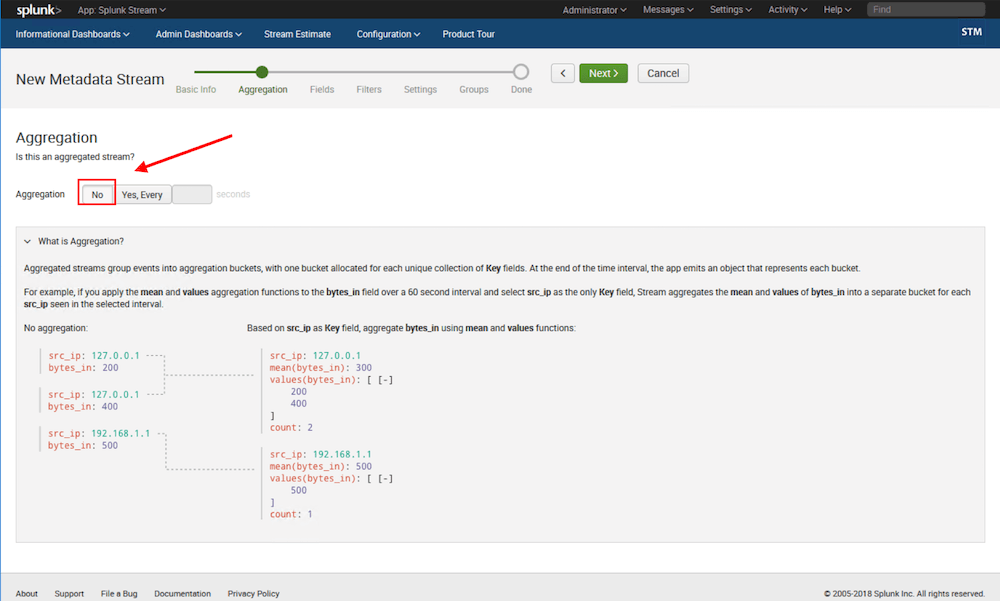
- On the Aggregation step, select No for aggregation, then click Next. (You don't want aggregation because you want to see the individual DNS records.)
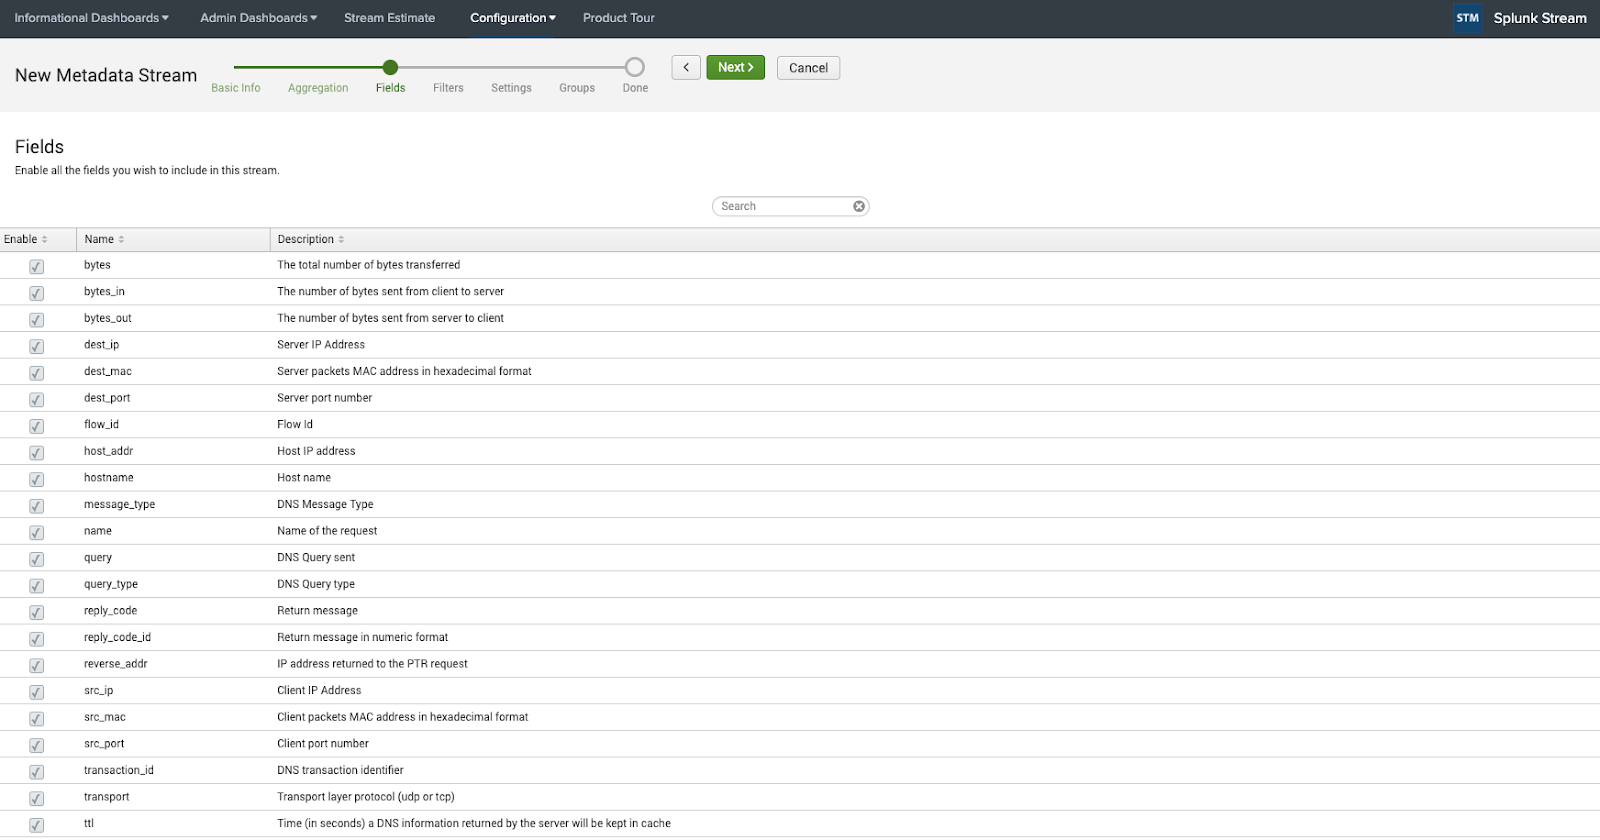
- On the Fields screen, select the fields (specific to DNS) that you want to collect and store. Note that some fields, not all fields are selected by default. For proper security alerting and investigation, we recommend that you enable at least the following fields:
bytesbytes_inbytes_outdest_ipdest_macdest_portflow_idhost_addrhost_typehostnamemessage_typenamequeryquery_typereply_codereply_code_idreverse_addrsrc_ipsrc_macsrc_porttransaction_idtransportttl
After you've selected the DNS fields that you'd like to collect, click Next.
- (Optional) Define the filtering of the collected data on the Filters screen. The filters are based on the fields you selected on the previous screen. For example, if you only wanted Stream to capture queries for external domains, you could define that here. At this stage, defining filters is optional because you might want to adjust filters later after you've collected data for a while and know what you have and what you'd like to keep or discard.

- Select the Next button again to go to the Settings screen, where you'll define the destination index for your DNS data.
- Select the destination index from the dropdown menu. This will be the index you have already created and are going to store DNS data in. If you don't see the expected index listed here, it is because you never created the index. Do so now. We recommend creating the same indexes on the Search Head running the Stream App as the Indexers. Although Stream won't store data in those indexes, it will show up in the dropdown here. In our example we are storing data to the netdns index.

- You can now choose to save the configuration in Disabled mode, if you're not ready to begin collecting data. You can also put it into Estimate mode to get an idea of how much data you'll be collecting after the configuration is enabled.

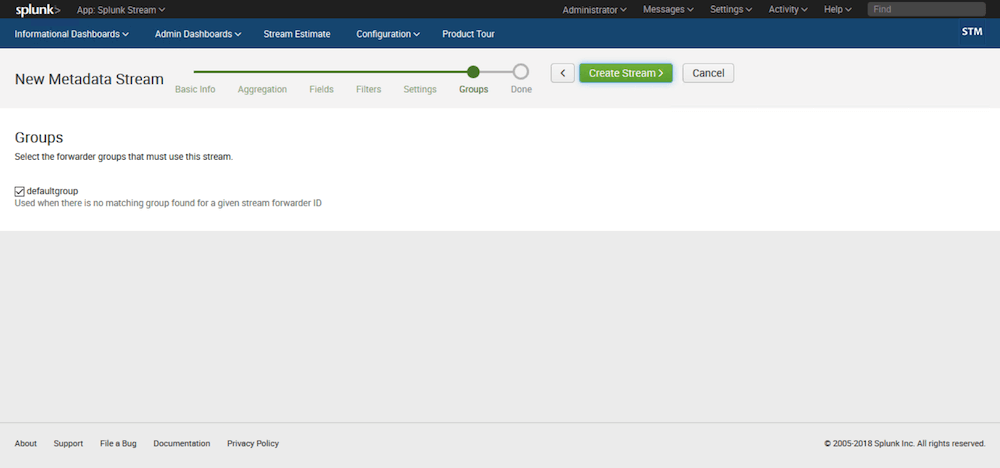
- Click Next to go to the Groups screen. Here, you can select a group with which to associate the Stream configuration. You can follow the Distributed Forwarder Management documentation to create and manage forwarder groups to manage which Streams apply to which groups and machines. Use either the default group, or select the group you would like the configuration to apply to. Finally, click Create Stream to save your configuration.
Validation
If you've enabled the configuration, you should now be collecting DNS data. You can validate this by searching for:
index=<dns_index> sourcetype=stream:dns
Replace <dns_index> with the index you created to store your DNS data.
You should able to see JSON blobs of DNS transactions, with fields available on the left.
