Optimizing Splunk MCP with LLM context management
You have recently integrated your LLM Agent with Splunk Cloud Platform. Your environment contains multiple indexes, lookups, and source types, but only a subset is relevant for each interaction. Currently, every time you initiate a new conversation with your LLM agent, you must manually specify which indexes, lookups, and source types to use. Different categories of use cases depend on distinct combinations of these data sources. Repeatedly providing this information for each session quickly becomes tedious and inefficient.
Prerequisites
- Access to a Splunk Cloud Platform environment in commercial AWS regions.
- An AI/LLM orchestration or workspace software or service that acts as an MCP client, along with some familiarity with configuring the connection to an MCP server. Many free, open source, and commercial third-party software options are available. The client must support the Streamable HTTP protocol.
Configuration
Follow the guidance in Configure the Splunk MCP server and Connect and use an MCP client to set up your MCP server.
Solution
To streamline context management and reduce repetitive setup, leverage dedicated workspaces with custom instructions. This prevents cold starts and ensures that your LLM agent is pre-configured with knowledge of the relevant context - such as which indexes, source types, fields, and lookups it should interact with. This approach enhances both efficiency and consistency across sessions.
Different LLM providers use distinct terminology for these contextualized workspaces:
- Anthropic: Claude Projects
- OpenAI: Custom GPTs
- Google: Gems
A best practice is to create a Splunk Context Document (SCM). This document provides a structured summary of your Splunk environment, tailored to your use case. To generate it, prompt your LLM agent to inspect relevant indexes, lookups, source types, and other configuration details, then output the findings in a structured Markdown (MD) file. This file can be uploaded or referenced within your workspace, providing persistent, session-independent context.
Example prompt
Use the following prompt to generate your SCM:
Give me a quick overview of this Splunk environment:

- List all non-system application indexes (exclude _* and internal indexes)
- Show the top N sourcetypes by event count over the last 30 days,
  excluding system sourcetypes (splunkd*, splunk*, stash, etc.)
- Get 1 sample event from each application index
- List all lookups specific to this environment's applications, organized by category
  (exclude lookups like AWS or geolocation)
- List all available data models (exclude disabled models)
- Report the data time range: oldest to newest event in application indexes

Format as a structured MD file with clear sections. Prioritize
indexes and sourcetypes if length becomes an issue.
The resulting markdown file serves as a ready-to-use context summary for your workspace. When creating or updating your workspace, give it a name that matches or clearly reflects the SCM it references.
Walkthrough: Setting up a Claude project
The following steps use Claude Desktop as an example MCP client.
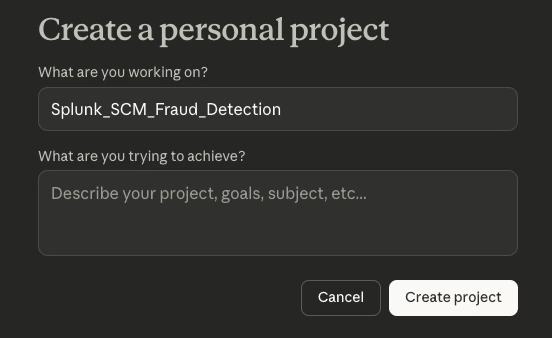
- Follow the instructions to How to create a project in Claude Desktop.
- Provide a project name that clearly reflects the context, using a naming convention such as Splunk_SCM_[UseCase] — for example, Splunk_SCM_KYC or Splunk_SCM_AML.
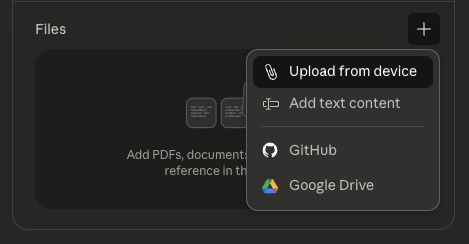
- Upload your prepared SCM Markdown file through Upload from device.
- You are now ready to start a new conversation with Claude, with the assurance that it has the right context loaded.

When you start a new conversation within this Claude Project, the agent will automatically reference the SCM, eliminating the need to repeatedly specify indexes, lookups, or source types.
- Ensure your SCM is updated whenever your Splunk environment changes.
- You can create multiple projects for different Splunk use cases or teams.
Next steps
After your AI client is connected to the MCP server and context has been added, you can begin working on the following use cases:
- Automating alert investigations by integrating LLMs with the Splunk platform and Confluence: Learn how to unify disparate tools, transforming multi-step manual IT investigations into automated, conversational workflows.
- Leveraging LLM reasoning and ML capabilities for Jira alert investigations: Learn how LLMs can correlate security alerts, create enriched datasets, and apply ML models. Utilize advanced ML for investigations, improving the impact of ML models through better data association and enabling the detection of anomalies across various data streams.
In addition, these resources might help you understand and implement this guidance:
- Splunk Lantern Article: Leveraging generative AI capability in security operations with the AITK
- Splunk Lantern Article: Leveraging Splunk MCP and AI for enhanced IT operations and security investigations
- Splunk Lantern Article: Creating, monitoring, and optimizing LLM retrieval augmented generation patterns
- Splunk Blog: Top 10 AI trends 2025: How Agentic AI and MCP changed IT
- Splunk Blog: Unlock the Power of Splunk Cloud Platform with the MCP Server
- Splunk Blog: Using Splunk to monitor the security of MCP Servers