New account fraud
Working as part of a fraud detection team, you need to be able to quickly identify when a customer’s account is taken over by a fraudster.
You need to be able to identify indicators of new account fraud, such as multiple accounts being opened with the same email address used across them. This process walks you through how to find incidents like this.
Data required
How to use Splunk software for this use case
The information in this article applies to Splunk Enterprise Security (ES) versions 7.x. If you have upgraded to Splunk Enterprise Security version 8.x, some terminology and steps might not apply. For additional assistance on this use case with ES 8.x, Splunk Professional Services can help.
- Install and configure the Splunk App for Fraud Analytics, following the installation instructions.
- From the Incident Review tab in the top toolbar of Splunk Enterprise Security, filter on Fraud under Security Domain to view Fraud Notables.

- Look for Status in the far-right column of the table shown. Sort by Status to review "InProgress" cases.

- In this example, we'll check Risk Object “Yaymcmillen” first. Open this incident by clicking on the caret to the left.

- Check the details in the incident. In this example, a number of fraud rules related to new account openings have been triggered. Many are related to email, and one indicates that the zip code and IP address are far apart.
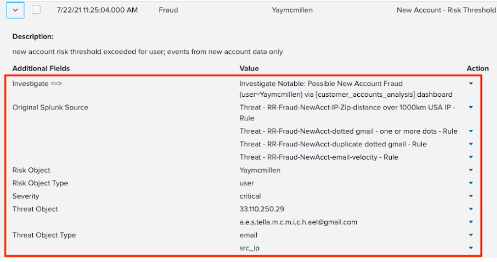
The Risk Object is the user we are protecting. The threat object(s) are the user attributes that are the threats or indicators of fraud, such as IP address and email.
- To the right of the triggered fraud rules you just examined, click on View the Individual Risk Attributes under Contributing Events to see what rules scores are.
- In the rules scores table, the sources of information that make up the different parts of the Total Risk Score are split out. In this example, four different sources are shown. One of these is the use of one or more dots (or periods) in an email address. Fraudsters often use dots to make different-looking emails which all resolve to the same email address, so the detection of many accounts using this technique is a strong indicator of fraud.

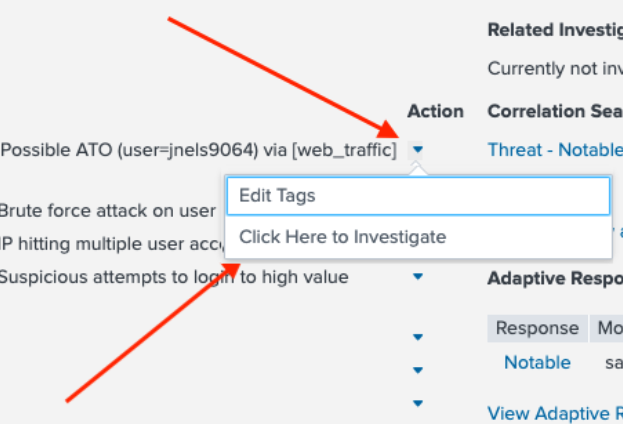
- Click back to go back fo the the incident details. Under Action, click Click Here to Investigate to investigate further.
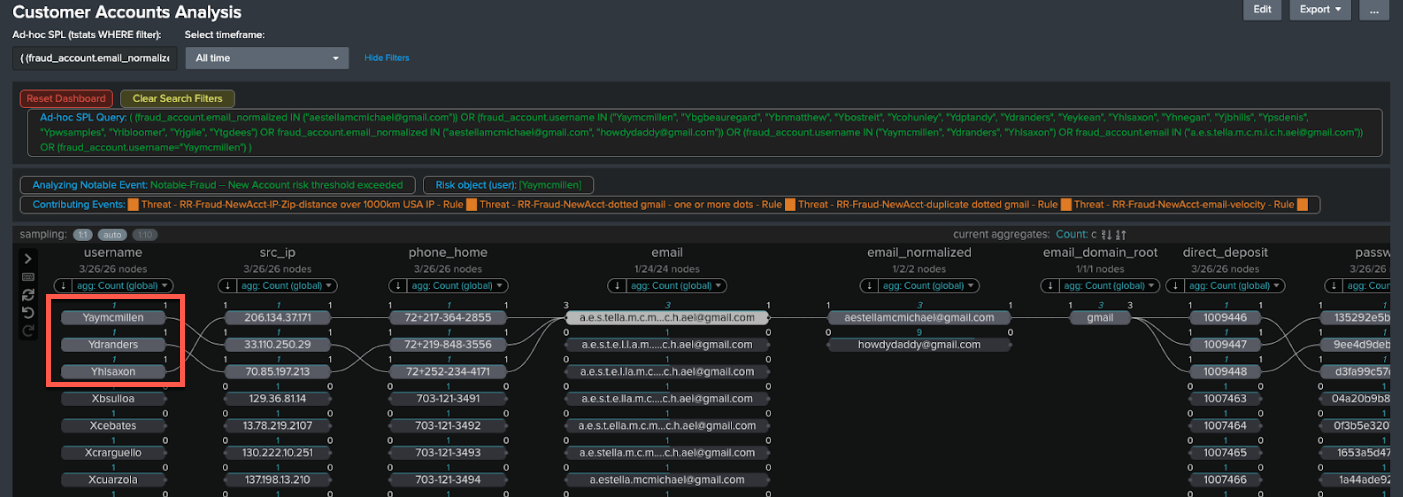
- This takes you to the Customer Accounts Analysis dashboard. In the example below, the arrow points to the Risk Object which is displayed as a reminder. The related risk rules that contributed to the notable event are shown in orange as Contributing Events.

- To see more, click on the username of interest and the attribute you want to investigate further. In this example, we'll click the username Yaymcmillen and then click on the email address with multiple periods in it.

- Here you can identify any other new accounts that use the same email address. In the example below, two other related new accounts (Ydranders and Yhisaxon) are linked, showing that the fraudster reused the same email address for those accounts.
- You can also see other accounts which look similar, which use the same email address but with dots in different places.
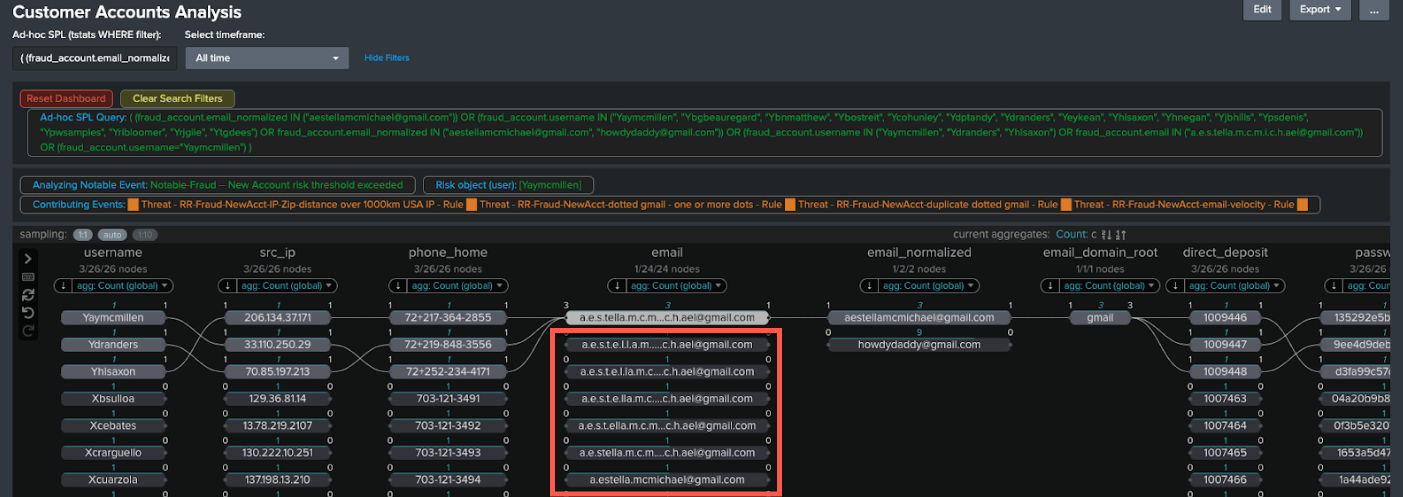
- The email field has also been normalized with dots removed. Click the normalized email address to see the full extent of new accounts created even where dots are used in different places.
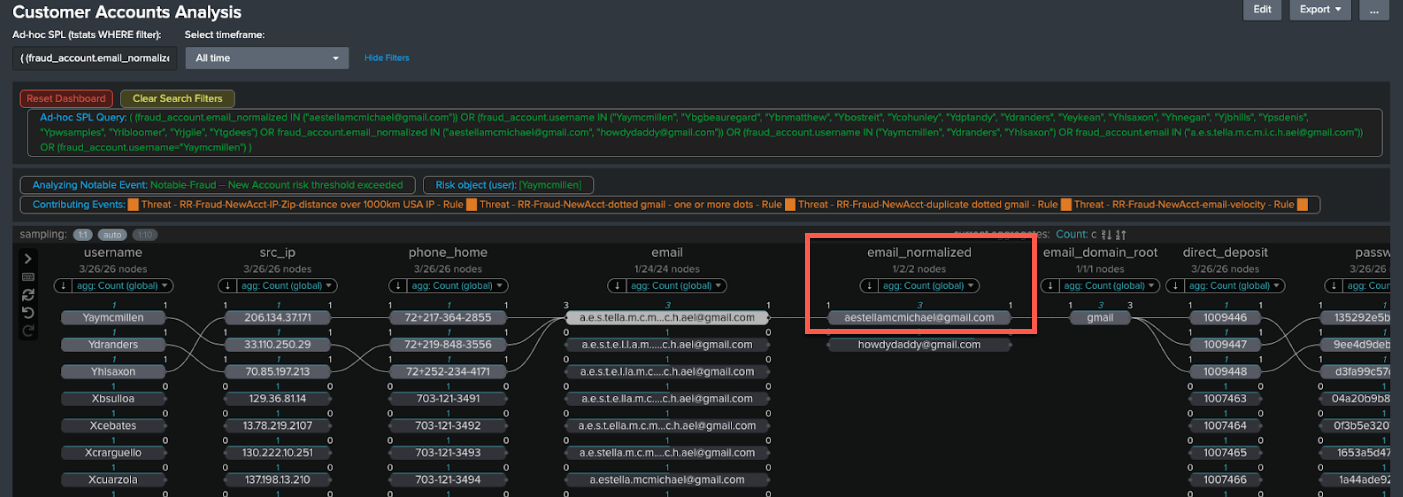
- Check the results. In this example there are a lot of email addresses with different numbers of dots used in different places.
- Check for other related results. In this example there is also another email, howdydaddy@gmail.com, in the normalized email column since the the link analysis visualization shows other highly linked data. It is not necessarily related to this case, but is worth investigating. The number 9 above it indicates how many entities are linked to it. You can click through to check those entities and ensure that there is a Notable set up to capture them, perhaps by tuning your fraud rules or thresholds if this hasn’t been caught.

Next steps
Now that you've completed this one, have a look at the other tutorials in the Detecting consumer bank account takeovers use case. In addition, this resource might help you understand and implement this guidance:
- Splunk Tech Talk: Detecting Account Takeover (ATO) fraud (Retail Focus)

