Suspicious web traffic
Working as part of a fraud detection team, you need to be able to quickly identify when a customer’s account is taken over by a fraudster.
Some types of web traffic behavior may indicate that fraud is occurring, for example, many different IP addresses attempting to log into a single account. This process walks you through how to find incidents like this.
Data required
How to use Splunk software for this use case
The information in this article applies to Splunk Enterprise Security (ES) versions 7.x. If you have upgraded to Splunk Enterprise Security version 8.x, some terminology and steps might not apply. For additional assistance on this use case with ES 8.x, Splunk Professional Services can help.
- Install and configure the Splunk App for Fraud Analytics, following the installation instructions.
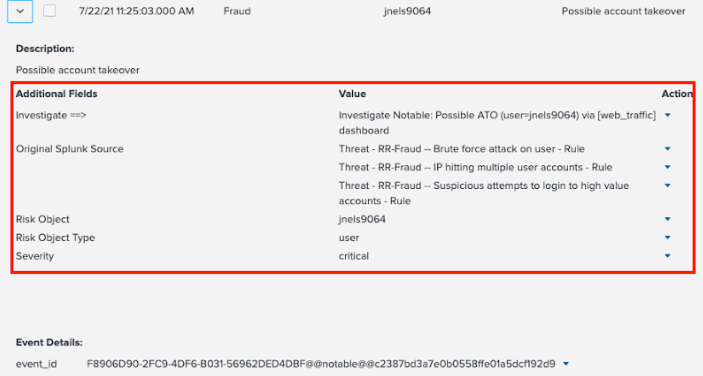
- From the Incident Review tab in the top toolbar of Splunk Enterprise Security, sort by Urgency and find an incident to investigate, then click on the caret to the left of the Incident Title to expand it and view the risk rules associated with the incident.

- In the example below, you can see that several risk rules have been triggered related to login and IP address behavior.
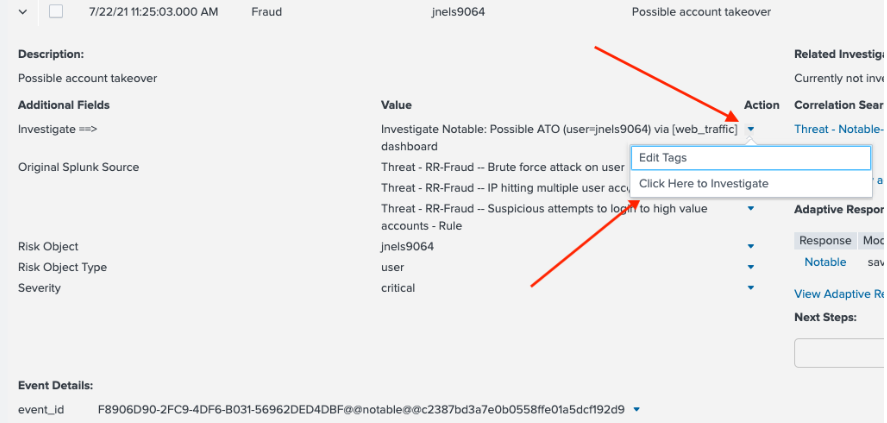
- Click on the Action caret next to the Investigate ATO notable, then click Click Here to Investigate to go to the Web Traffic Dashboard.
- Review the Web Traffic Dashboard. Here you can see the user listed under Risk Object, in this example the user jnels9064. You can also see the Contributing Events, or the related risk rules, that triggered to make up this notable event.


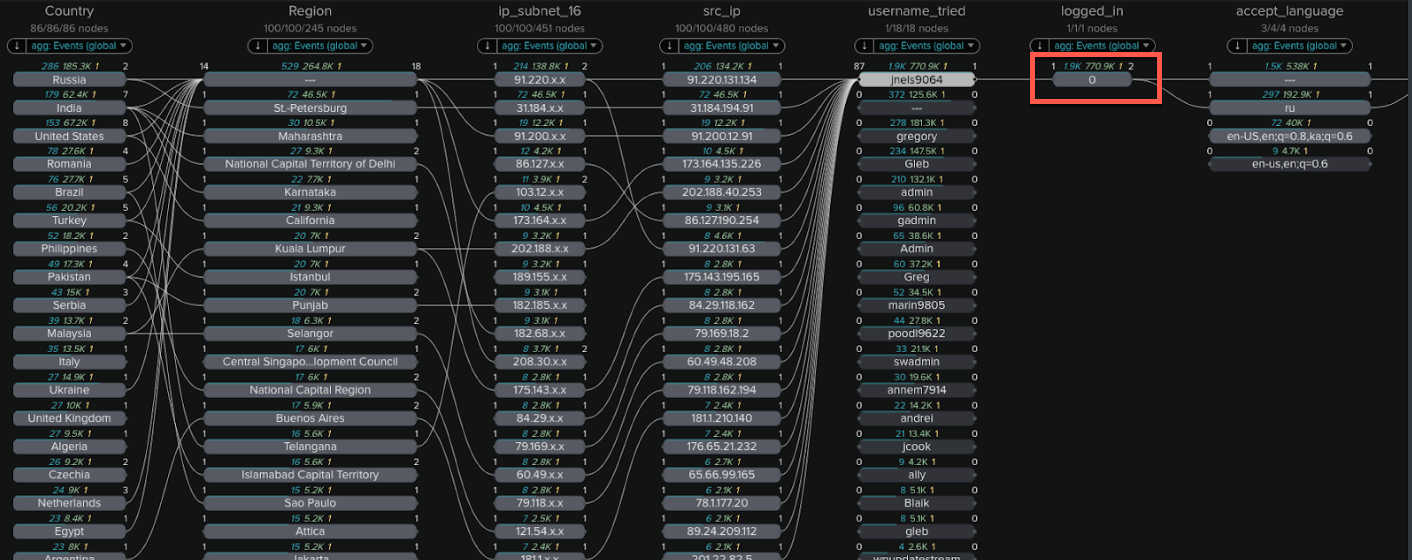
- Scroll down and click on the username in the username_tried field. In the example below, you can immediately see many IP addresses accessing this account from many different countries. The column for logged_in also has a value of 0 - for this web site, this indicates a failed login for all attempts.
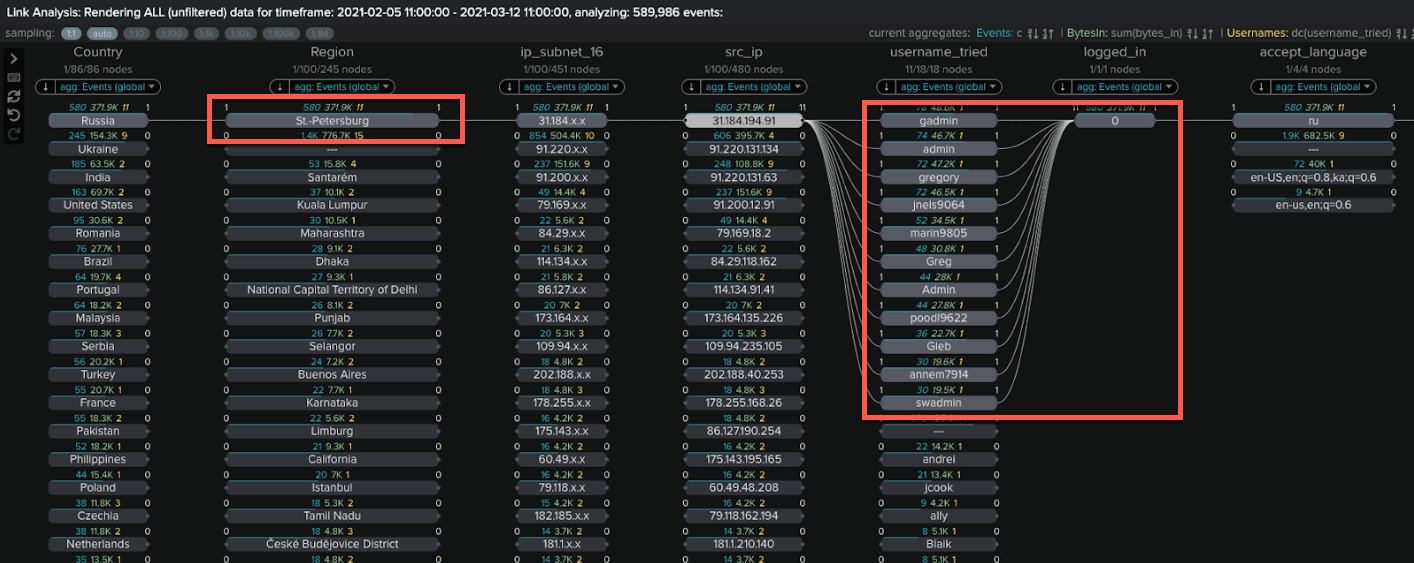
- At this stage you might want to investigate some of the IP addresses listed to see if attempts have been made to log into other accounts from that IP address. To do this, click on one of the IP addresses. In this example we click on the second IP address down, the IP address in the src_ip column below reading 31.184.194.91.
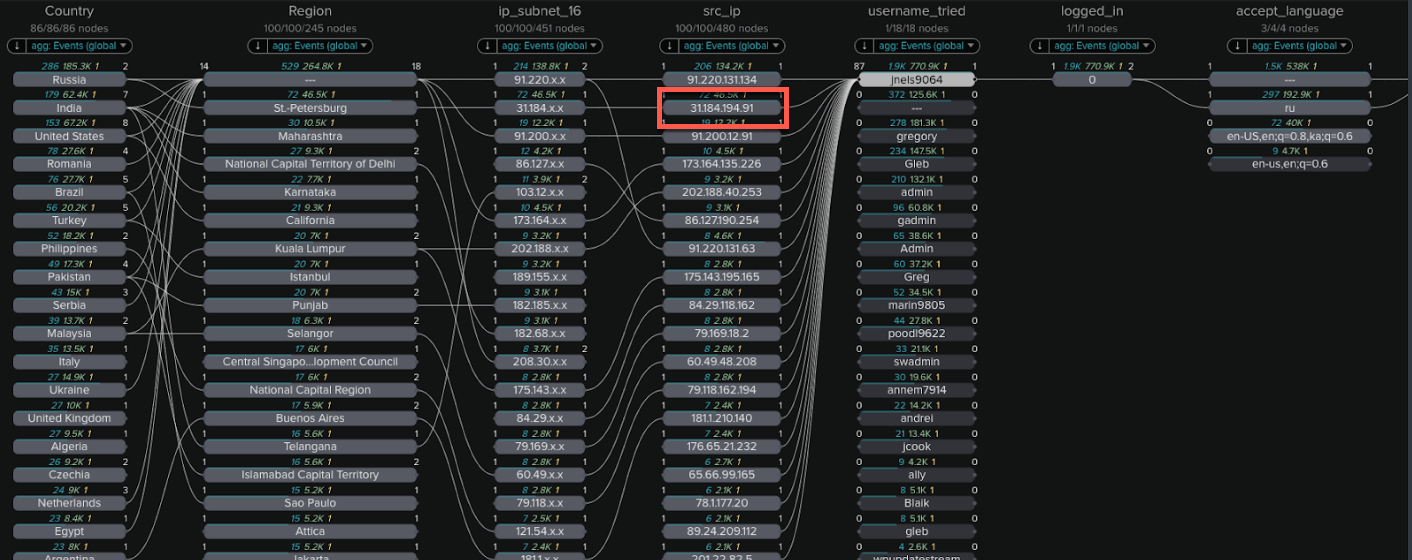
- In the Link Analysis example below you can see that this IP address is from St Petersburg in Russia, and it also tried to login to multiple other accounts, with all logins failed.
- At this point you will likely conclude that the IP address and attempted logins are all from a bad actor. You should talk to your InfoSec team about blocking this IP or adding it to a watch list.
Next steps
Now that you've completed this one, have a look at the other tutorials in the Detecting consumer bank account takeovers use case. In addition, this resource might help you understand and implement this guidance:
- Splunk Tech Talk: Detecting Account Takeover (ATO) fraud (Retail Focus)

