Configuring the Splunk On-Call integration with IT Service Intelligence
Your company uses Splunk ITSI to normalize, correlate, and group related alerts, as well as generate incident notifications. Now, you want these critical notifications sent to Splunk On-Call to quickly get actionable Splunk ITSI episodes to the right teams so they can resolve problems.
This article is part of an overall alert management workflow that's described in Managing the lifecycle of an alert: from detection to remediation. To implement the entire workflow, before you follow these steps, make sure you have done the following:
- Integrated Observability Cloud alerts with Splunk Cloud Platform or Splunk Enterprise}
- Normalized Observability Cloud alerts into the ITSI Universal Alerting schema
- Configured Universal Correlation Searches to create notable events
- Configured the ITSI Notable Event Aggregation Policy (NEAP)
- Configured ITSI correlation searches for monitoring episodes
How to use Splunk software for this use case
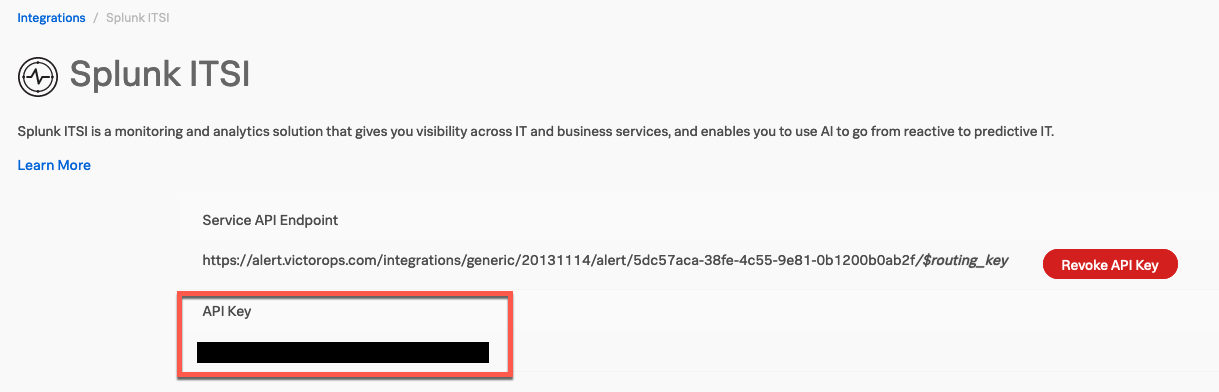
- Enable the integration for Splunk ITSI from Splunk On-Call. To enable this integration, from Splunk On-Call’s web portal, navigate to Integrations > 3rd Party Integrations > Splunk ITSI > Enable Integration. This generates a Service API Endpoint and API Key. Copy the API Key to the clipboard as you'll need it in a later step. The screenshot below shows where the API key can be seen, although in this example it's blacked out for privacy reasons.
- Download the Splunk On-Call (VictorOps) app from Splunkbase and install it on Splunk Enterprise or {{cloud)). For more information on how to install any Splunk-supported add-on to your {{platform}}, refer to Splunk Help. You must restart {{enterprise}} to complete the install. After you install it, the app can be seen under Apps in the left-hand navigation pane.
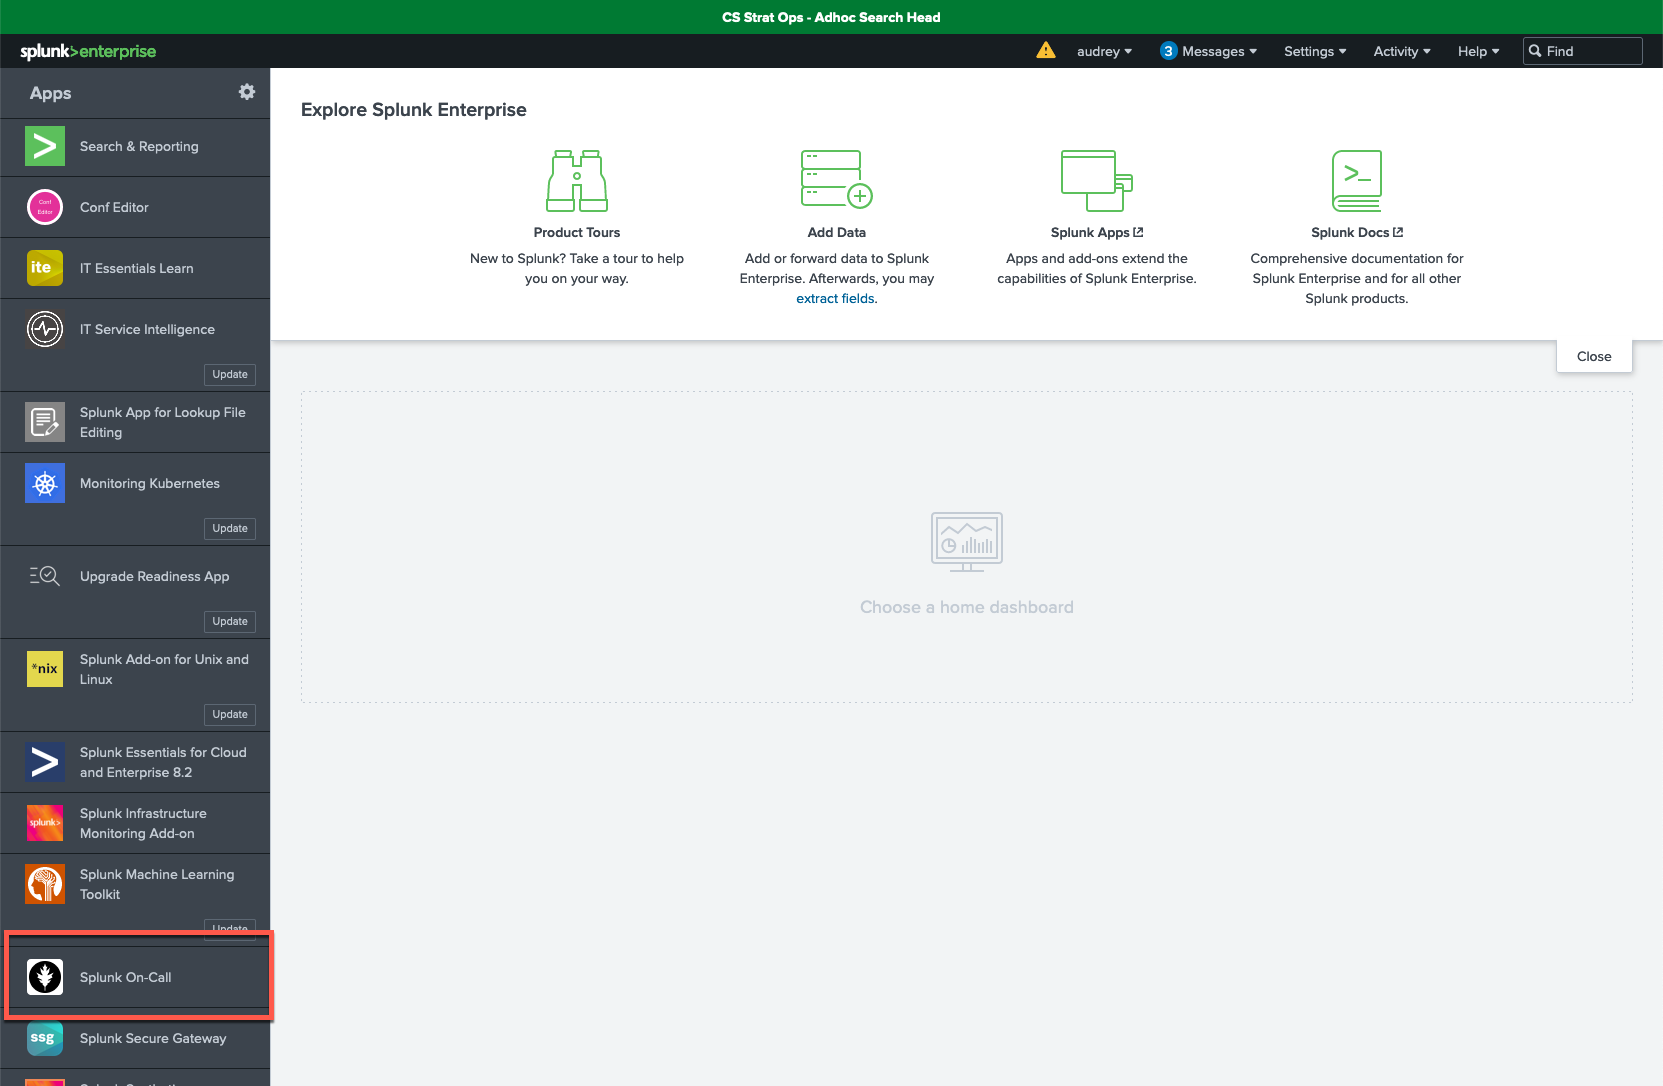
- Open the app to begin the configuration from the Configure Splunk On-Call home page.
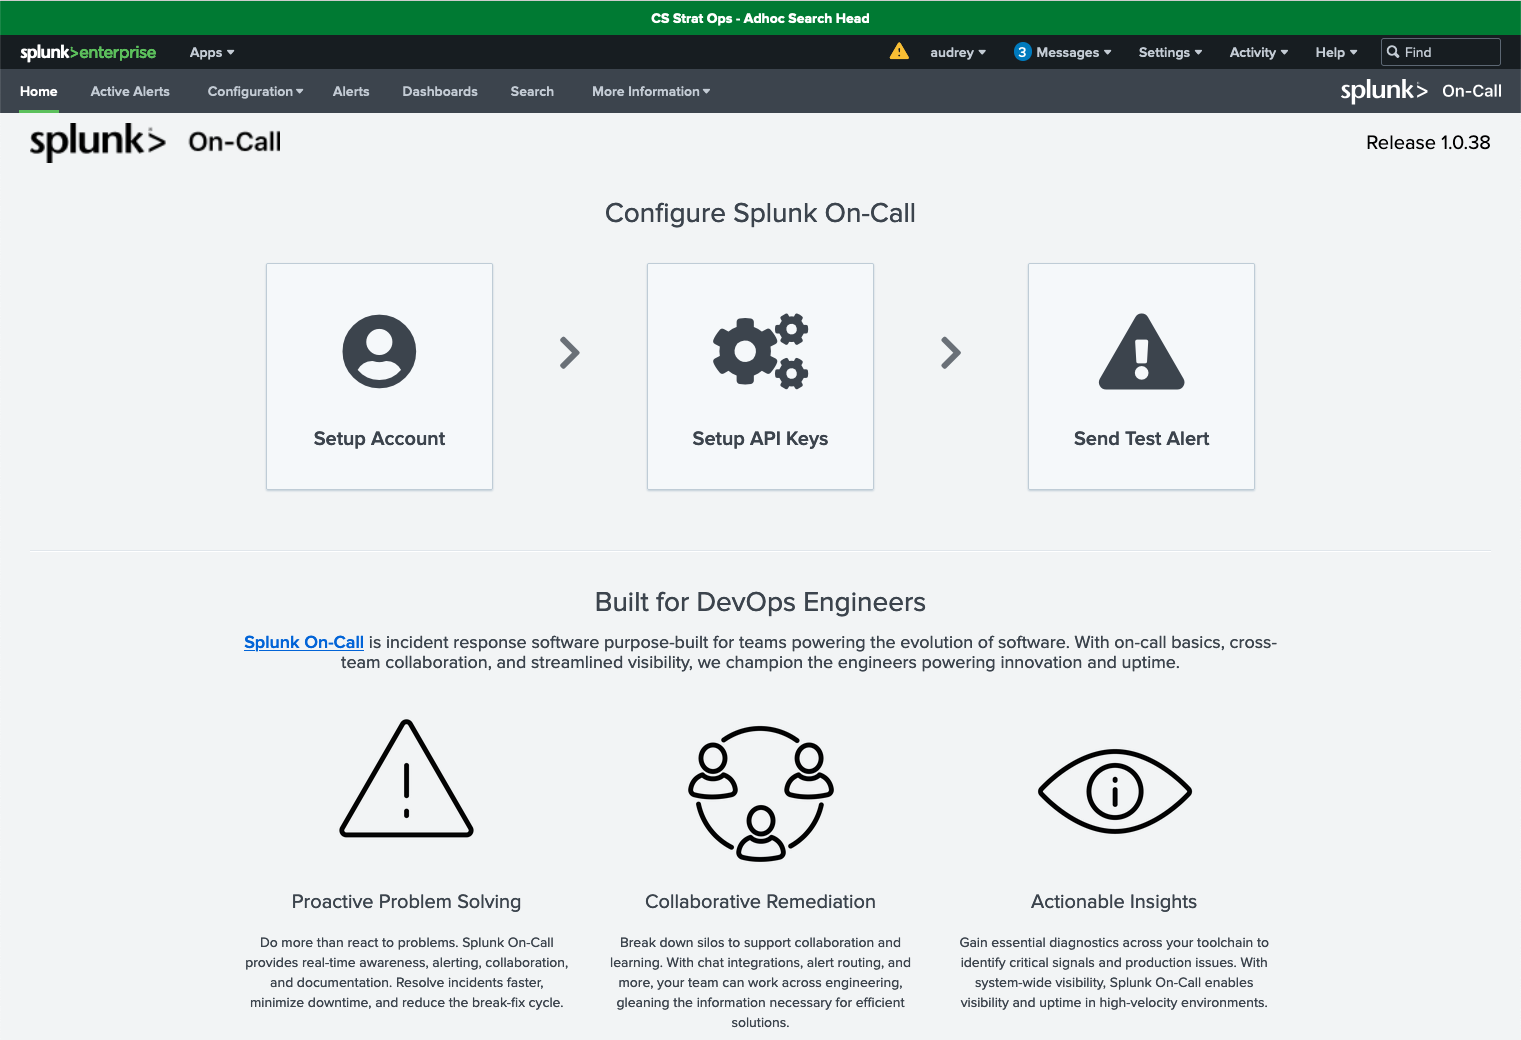
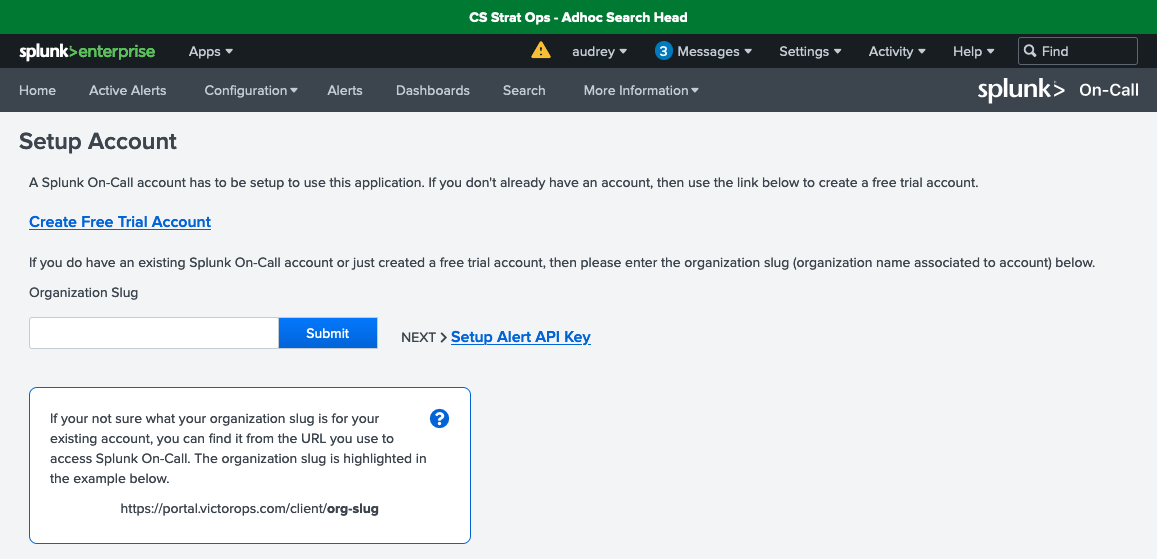
- Click Setup Account. On this page:
- Specify the organization slug or organization name associated with the Splunk On-Call account. If you're not sure what your organization slug is for your account, you can find it from the URL you use to access Splunk On-Call, for example, https://portal.victorops.com/client/org-slug.
- Click Submit, and you should get the message “Successfully Saved Organization Slug”.
- Click the Dismiss button.
- Click Setup Alert API Key to move to the next step.

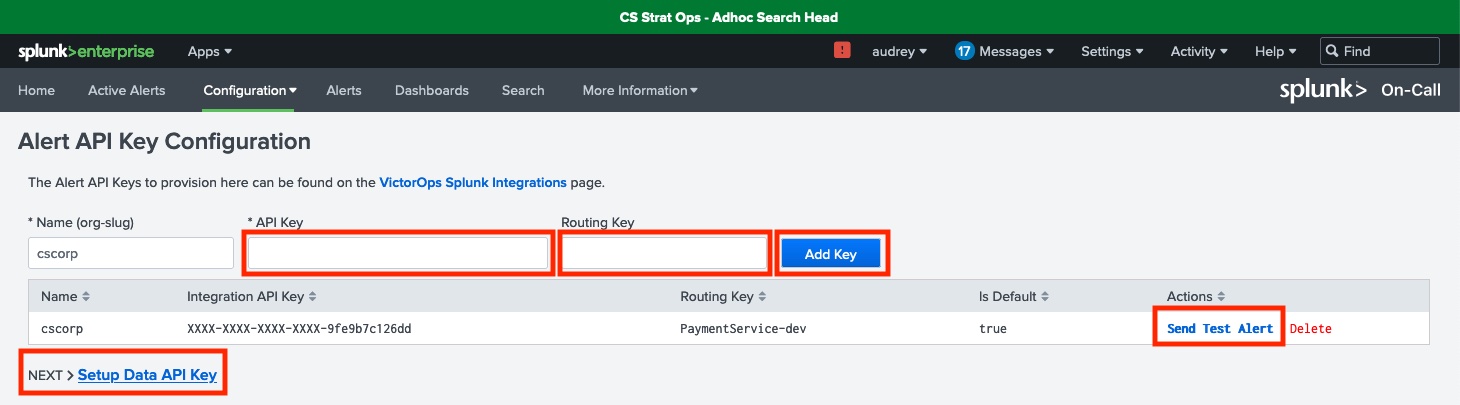
- On the Alert API Key Configuration page, the Name (org-slug) field is pre-populated for you. Complete the following:
- Enter the API key that you copied to your clipboard in step 1, and also enter the Routing Key. The routing key controls the routing of incidents to specific teams. If the routing key is left blank, alerts will be routed to your default routing key.
- Click the Add Key button. You should see your new configuration added to the list.
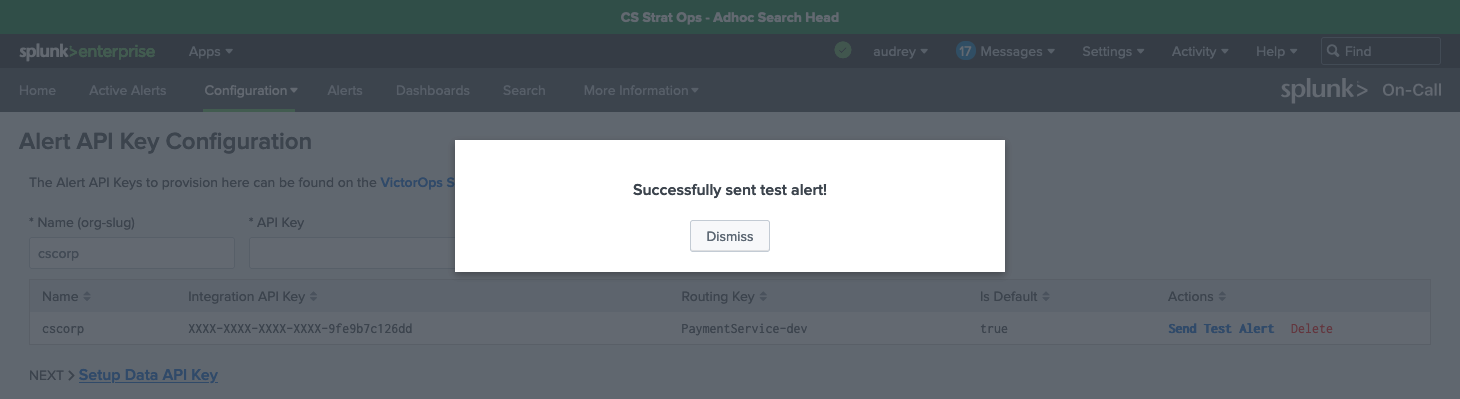
- Test your configuration by selecting the Send Test Alert link under Actions. This should return a “Successfully sent test alert!” message.
- Click Dismiss.
- Click Setup Data API Key to proceed to the next step.
This test alert will not be marked as an incident in your org, as it is an info alert. To find this test alert, you’ll need to look in your Timeline instead of the Incidents tab. If you want to have the alert marked as an incident, you can go to Search & Reporting and enter
| sendalert victorops param.message_type=”CRITICAL”.
- Data API Configuration allows you to retrieve routing keys for your Splunk On-Call organization (or org-slug) via the Splunk On-Call API, which makes it easier to configure Splunk On-Call alert actions in Splunk ITSI. On this page:
- Enter your organization’s Splunk On-Call API ID and API Key. You can find this in the Splunk On-Call web portal, by clicking Integrations > API.
- Click Add Key.
- Click the Retrieve Routing Keys link. This retrieves the most up-to-date list of your organization’s routing keys.
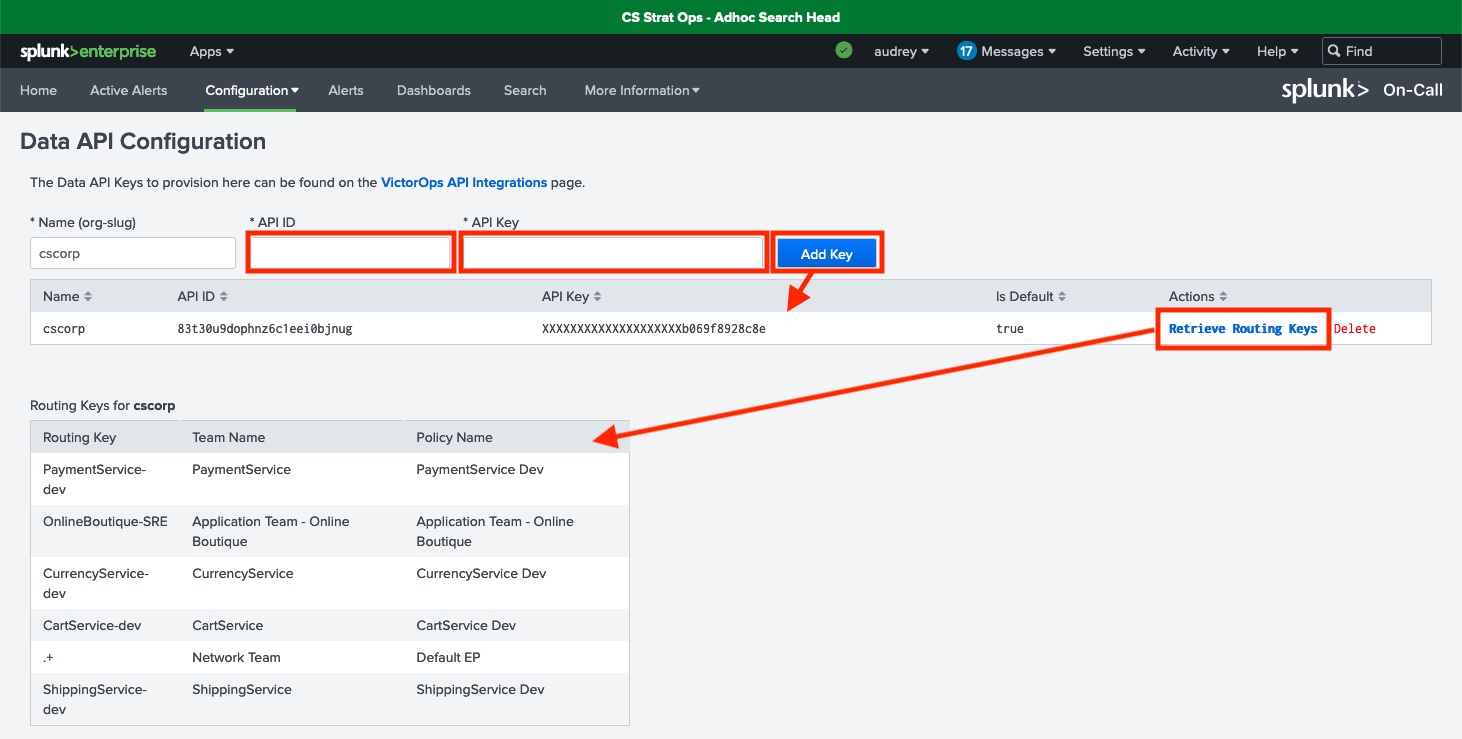
If you have not configured your Data API keys correctly, when you configure your “Create VictorOps incident” action rule in Splunk ITSI you will get an error that reads “No Routing Keys Found”.
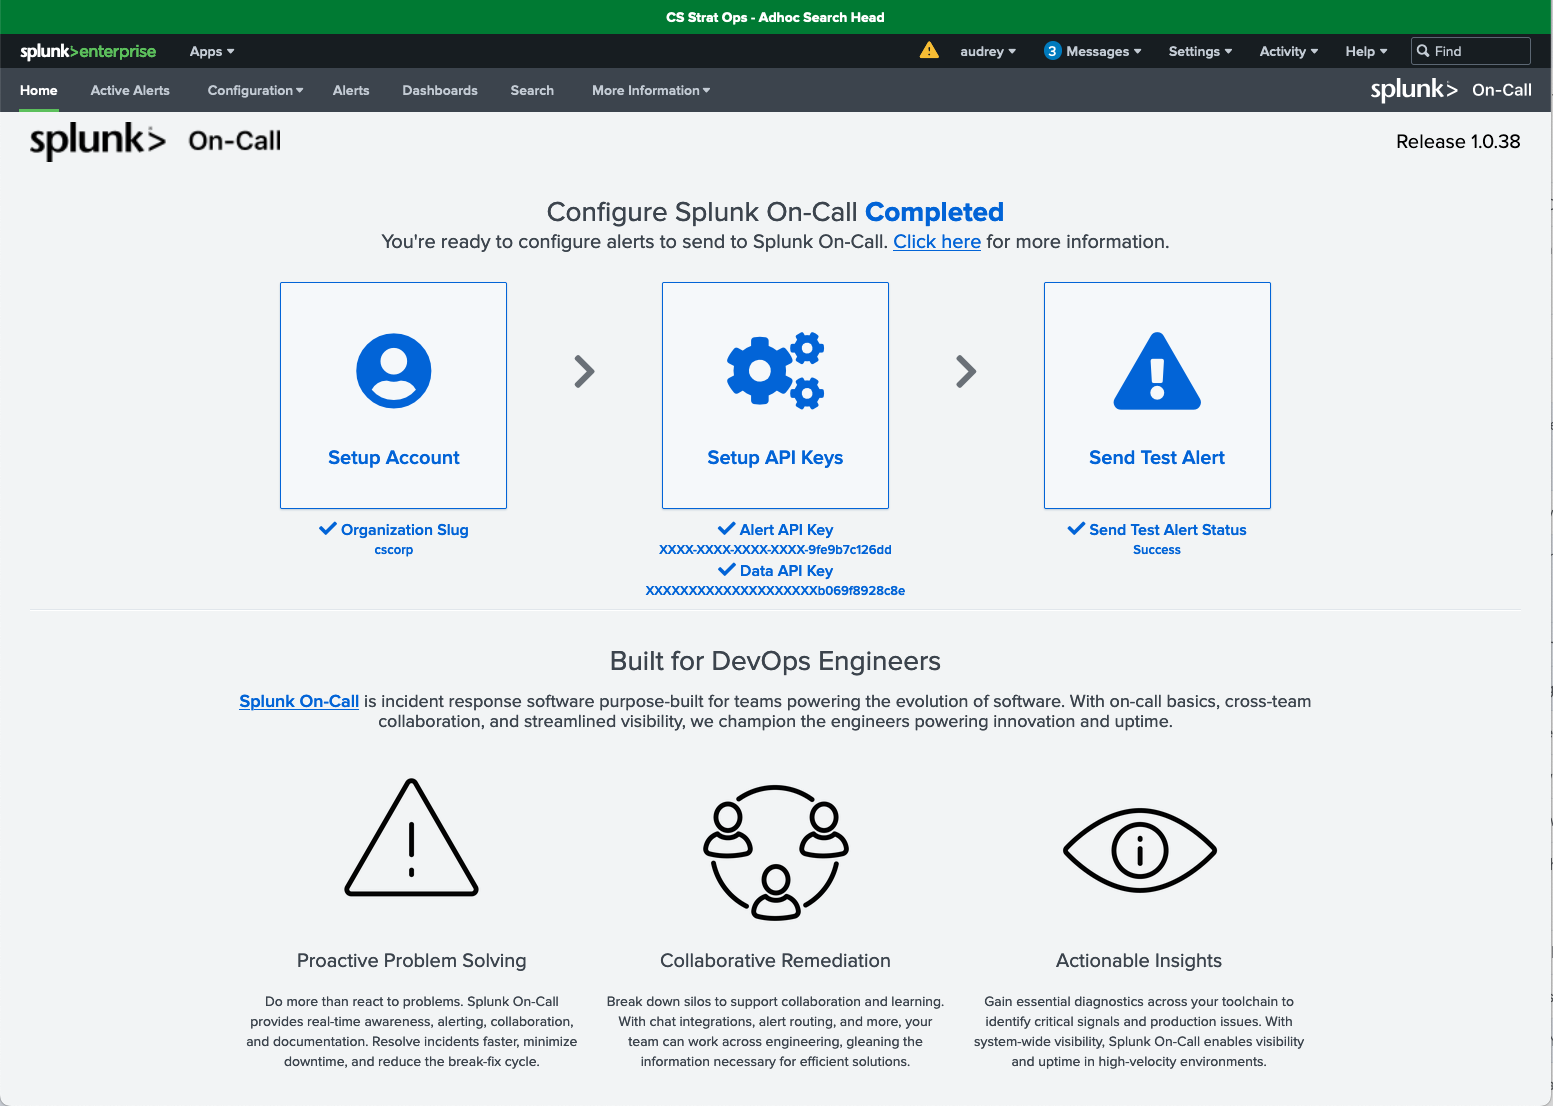
- After your configuration is complete, you will see a check under each configuration step.
Next steps
You are now ready to configure action rules in the Splunk ITSI Notable Event Aggregation Policy for Splunk On-Call integration. In other words, a “Create VictorOps incident” action rule can now be used as an Alert Action in Splunk ITSI to send notifications or resolve Splunk On-Call incidents, as shown below.
Still having trouble? Splunk has many resources available to help get you back on track.
- Splunk Community: Ask your question to the Splunk Community, which has provided over 50,000 user solutions to date.
- Splunk Customer Support: Contact Splunk to discuss your environment and receive customer support.
- Splunk Observability Training Courses: Comprehensive Splunk training to fully unlock the power of Splunk Observability Cloud.