Implementing risk-based alerting
With Splunk Enterprise Security, you use the traditional approach of alerting on narrowly-defined detections that are often reactive to the current trends in attack methods. As a security analyst, you would like to have more tangible, actionable alerts with much higher fidelity.
Introducing risk-based alerting
Risk-based alerting (RBA) provides teams with a unique opportunity to pivot resources from traditionally reactive functions to proactive functions in the SOC. As alert fidelity and true positive rates increase, analysts’ resources can be shifted to higher impact tasks like threat hunting or adversary simulation, empowering SOCs to build up the skill sets of their analysts and prepare them for any threats they might encounter.
The RBA methodology is very similar to what you are likely already doing in Splunk Enterprise Security. It uses nearly all of the existing frameworks within Splunk Enterprise Security but includes a few optimizations that dramatically increase efficiencies and general security maturity within the SOC.
The benefits of RBA include:
- A dramatic reduction in the overall alert volume (alert fatigue)
- Improved detections
- Alignment with popular frameworks such as MITRE ATT&CK
- More detections and data sources without scaling up SOC operational costs
- Increased detection time ranges
- A more streamlined deployment process
Key features
The frameworks in Splunk Enterprise Security version 6.4 and later provide out-of-the-box features for implementing RBA. You can leverage the Risk Analysis adaptive response action and assign risks to multiple unique risk objects within a rule. Additionally, you can use the modular input for MITRE ATT&CK, which links Risk Rules to corresponding MITRE ATT&CK technique IDs through CSE (Risk Annotations). All corresponding MITRE context is stamped into the event.
- Annotation Framework
- Use annotations to enrich your correlation search results with the context from industry-standard cyber security framework mappings
- Risk Analysis Adaptive Response Action
- Added flexibility when attributing context to risk objects
- Improved integrations with the Asset & Identity framework
- Stored lookup that adds the additional MITRE ATT&CK context based on the technique
- Risk Factoring Framework
- Provides the ability to modify the risk score up/down based on field values in the risk index
- Usually based on asset/identity info but can operate on fields like “action”, “priority”, “category”, etc.
- Applied when events are inserted into the Risk Analysis data model
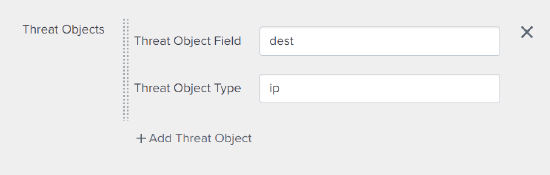
- Threat Objects
- Allow you to associate possible Indicators of Compromise (IOC) with an analytic
- Create a new vector in security that allows you to understand “behavior” from an IOC perspective
- Lower the barrier for localized threat hunting
- Aid in the investigative process
- Allow you to attach many possible IOCs to the notables that get sent to Splunk SOAR
By using the Threat Objects feature in your risk rules, you can build a local repository of Indicators of Compromise (IoC) or Indicators of Behavior (IoB). This threat data is extremely important due to its high relevance to investigative, threat intelligence, and especially threat hunting activities within the SOC.
Getting started with RBA
RBA uses the existing Splunk Enterprise Security correlation rule framework to collect interesting and potentially risky events, grouping them together in a single index. From there, the system generates a risk notable alert only when specific criteria are met, which helps prioritize high-risk events. This reduces the number of alerts SOC teams need to review, saving time and easing the workload for analysts.
We know that starting with RBA can be challenging. That's why we’ve created this RBA Adoption Guide to help you set it up quickly and smoothly. In the guide, you’ll find expert-recommended resources to help you identify your current RBA progress, deepen your understanding, and explore next steps.
The following are the components that make RBA work. They are part of the continuous workflow of creating and developing your RBA maturity. These components can be summarized into five categories:
- Risk rules & notables
- Risk rules add events to the Risk index
- Risk notables are created by the risk incident rules
- Risk scoring
- Initial scoring of assets & identities
- Risk modification
- Risk is updated by risk factors & ad-hoc risk changes
- Risk attribution
- Enhanced by MITRE tactics & techniques
- Visualizations & Workflow
- Analysts use dashboards & workflows to work through the high fidelity risk notables
RBA risk rules can be sourced from the collection of out-of-the-box Splunk Enterprise Security rules from ES Content Updates (ESCU) or Splunk Security Essentials (SSE).

How to implement RBA
Follow the Adoption Guide above to learn how to complete your initial implementation. After RBA is running in sandbox mode and you see the risk index populating and risk factors being applied, you're ready to start customizing RBA to better fit your environment.
The following steps will guide you through getting started with enabling support for the RBA methodology within your Splunk Enterprise Security environment.
- Modify existing correlation searches in ES.
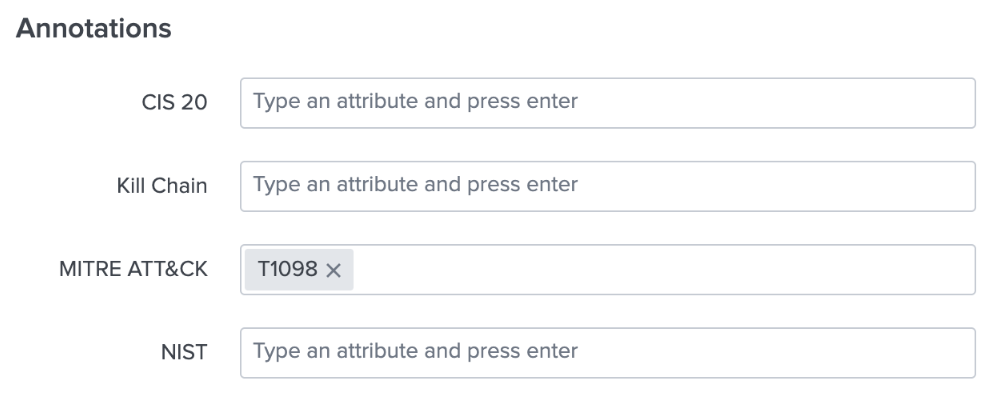
- Add MITRE ATT&CK technique. In the top navigation bar in Splunk Enterprise Security, click Configure > Content > Content Management, then filter by Type=Correlation Search. Select the correlation search you would like to modify and locate the annotations section. Refer to the MITRE ATT&CK matrix and locate the technique or subtechnique that best aligns with your correlation search. Enter the technique number into the annotations.
- Add a risk analysis adaptive response action. In your query, you will often have multiple entities. An entity can be any user/device field such as username, IP addresses, host names, etc. Most often these will be fields like
src,dest, oruser. There can be multiple risk modifiers, so ensure that each entity in your search query is represented. This example will create two risk entries, one forsrcand one foruser.
If you don’t know what risk score to use, consider using the same value for everything such as 10 unless you have a reason to do otherwise. -
The Risk Factor Editor allows for fine-tuning of Risk Scores based on organizational- and environmental-specific policies. This context enables a true Risk informed triage and analysis of observed behavior. For example, in the following screenshot, we have added five (5) to the risk score whenever a user is categorized as a Contractor because they present additional risk due to different personnel security controls. By using Risk Factors effectively, you can be sure you're pointing your analysts to the most important events based on your organization's needs.
- Determine the alert action. Keeping the notable alert action is optional. One suggestion is to create “Informational” notables so you can still investigate them in the incident review page.

- Add MITRE ATT&CK technique. In the top navigation bar in Splunk Enterprise Security, click Configure > Content > Content Management, then filter by Type=Correlation Search. Select the correlation search you would like to modify and locate the annotations section. Refer to the MITRE ATT&CK matrix and locate the technique or subtechnique that best aligns with your correlation search. Enter the technique number into the annotations.
- Start searching the risk index. After you have developed a baseline of risk data, search the risk index (index = risk). This will help you become familiar with the data and annotations that are building.
Also consider ways you could work with this data. For example:- Look at the
risk_objectfield. How can you see if more than one MITRE technique has occurred for any given value? - How can I add up the risk scores for each
risk_object? - Over what time span does the analysis make the most sense? Should I analyze 7 day windows, 31 days, or something else?
- Look at the
- Enable the built-in aggregation rules. There are two correlation searches included in ES that are designed to create risk notables.

The “ATT&CK Tactic Threshold Exceeded” detection looks for risk objects that have seen multiple attack techniques over a 7 day window. Consider changing the “where” clause to make it more or less sensitive.
For example:| where mitre_tactic_id_count >= 2 and source_count >= 2On a similar note, look at the “Risk Threshold Exceeded” detection and consider what changes to make. One suggestion is to change it to a longer time span to help find low-and-slow attacks. You can also adjust the risk threshold as needed.
- Update the incident review settings. On the ES Incident Review page, you should now see the “Risk notables” type when the above alerts trigger.

You will also be able to view the risk event timeline from the risk object.
This timeline provides a powerful view in order to begin an investigation and visualize all risk events.
If you have been using Splunk Enterprise Security for a while and have previously customized the incident review settings, you might not see these new columns. To add those back in, go to Configure > Incident Management > Incident Review Settings. Review the columns you have and consider adding back in any fields below that you might need.
That’s it! Now you can start going through additional correlation searches and performing the same steps to add more context into the risk index. If you get stuck, use the MITRE ATT&CK framework or the Splunk Security Essentials app to discover new behaviors that are of value to your team.
For more information, review this comprehensive step-by-step guide: The Splunk Guide to Risk Based Alerting (RBA)
Next steps
For a comprehensive RBA demo and workshop, or to engage Professional Services for setting up RBA in your environment, reach out to your Splunk account team or representative. In addition, these Splunk resources might help you understand and implement this use case:
- Splunk YouTube: Risk-based alerting: The new frontier for SIEM
- Splunk .Conf Talk: Supercharge your risk-based alerting (RBA) implementation
- Splunk .Conf Talk: Building behavioral detections: Cross-correlating suspicious activity with the MITRE ATT&CK framework
- Splunk .Conf Talk: Modernize and mature your SOC with risk-based alerting
- Splunk .Conf Talk: Getting started with risk-based alerting and MITRE
- Splunk .Conf Talk: Tales from a threat team: Lessons and strategies for succeeding with a risk-based approach
- Splunk .Conf Talk: Full speed ahead with risk-based alerting (RBA)
- Splunk .Conf Talk: Streamlining analysis of security stories with risk-based alerting
- Splunk Help: Isolate threats with risk alerting
- Splunk Resource: Curing alert fatigue with risk-based alerting, MITRE ATT&CK and automation